Saturday, March 24, 2012

Spinach dip in a cobb loaf


I don't know whether this has anything to do with my own creeping state of motherhood, but lately I've been fantasising about some of the kitsch, 80s dinner party fare that meant in my childhood that shit was getting fancy.  I'm talking about little tuna and cheese pastry parcels (we called them tuna savouries), chocolate-peppermint cheesecake, and anything that could be prepared in a microwave.

So when I was invited to a pot luck dinner tonight, where considerations like wanting to cater to vegetarians in case there were any, and wanting to bring something that was easy to prepare and easy to share, I knew instantly that I would make spinach dip in a cobb loaf.

As a child, I thought that this was the poshest thing that could possibly be done with food.  The bread is the bowl, you guys! In seeking out recipes, I've also realised that ingredients-wise, this is true to form retro Australian cuisine.  I didn't want to vary the original intent of the dish too greatly, but I did make a couple of tweaks, particularly in the form of nutmeg, which frankly should be paired with spinach whenever and wherever possible.  It also takes about 10 minutes to make.  I am keenly anticipate a mixture of delight and mirth when I rock up with this tonight.

Here it is in all its glory.

Ingredients:
  • 1 cobb loaf 
  • 1 packet frozen spinach
  • handful of spring onions
  • 1 tub of sour cream (approx 250ml)
  • 1 tub of cream cheese (approx 250ml) 
  • 2 heaped tablespoons of mayo
  • 1 packet spring vegetable soup (or some other innocuous flavour)
  • 1/2 teaspoon nutmeg
  • cracked pepper

Okay, so you can make this dip in four simple steps:

1. Chop the spring onions
2.Thaw the spinach and squeeze all the water out of it


3. Put everything in a big bowl


4. Mix


Once you've got your dip prepared, prepare your bread bowl.  First slice the top of the loaf, about one third down.  Then hollow out the centre.


Fill the emptied belly of the cobb with the dip. Then replace the lid.  'Whala', as A Wild Young Under Whimsy would say.  You have dip in a bread bowl! To an unsuspecting person, it just looks like bread. Ingenious, huh.


Warm the whole lot in a slow oven (approx 150 degrees C) for about 30 minutes.  Finally, break the extra bits of bread for the centre and place them around the loaf to serve.


Mmmmm.  Tastes just like 1983.

Sunday, March 18, 2012

Peach and yoghurt muffins with spicy crumble tops


So my wonderful BF has requested that I refrain from baking entire cakes given that we're a household of two,  he works from home, and has something of a mad sweet tooth.  But similarly, in light of said sweet tooth, he does look awfully sad when I bake things and then take them to work and he doesn't get any.  So in receiving a bag of fresh peaches from his Mum's tree, I had a dilemma.  I dilemma I solved with muffins.

I don't care what illusion about muffins being healthy anyone tries to delude themselves with: muffins are tiny cakes.  Incredible tiny cakes.  I also do not endorse those giant cafe sized muffins that are the size of a baby's head.  They are just bigger cakes.  I like muffins to be a bit wholesome, full of fruit, sweet, moist and just big enough to stave of the urge to eat lunch at 11am.  They also allow me to leave a few at home for Leith, and still supply baked goods for the Monday WIP, thus earning double kudos.

The other wonderful thing about this recipe is that peaches can be interchanged for pretty much any other kind of fruit you have to hand.  Banana would be excellent. Pineapple would be amazing.  Berries, apple, pear.  You name it, you nom it.

In baking these muffins, one must invoke several of my fundamental rules of baking.  This is a good thing.  Namely:
  1. Bake with yoghurt wherever possible.
  2. Use your hands.
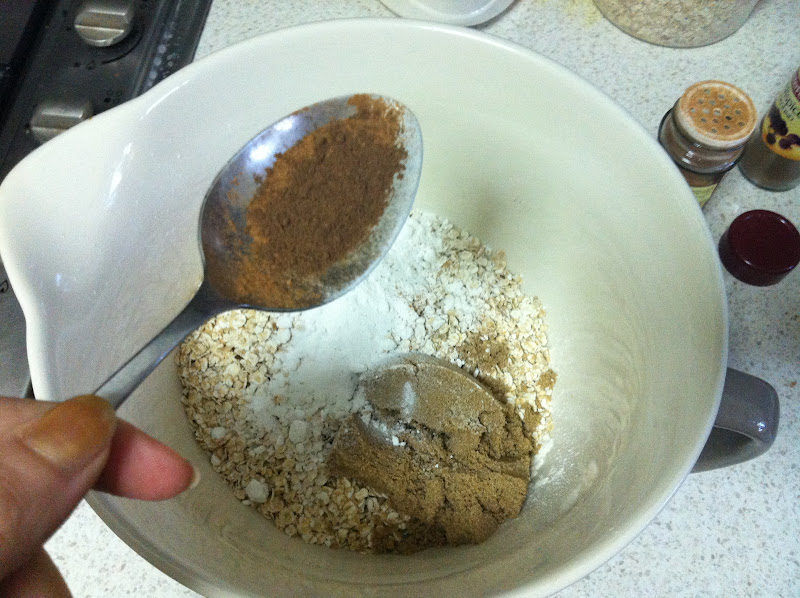
  3. No matter how much spice a recipe recommends, always use more. I don't know why so many recipes are spice shy but I call bullshit on it.  If you're anything like me, use, like, three times as much, probably.*
  4. Lick your fingers.
  5. Don't measure any ingredients in crumble topping.  If in doubt, add more sugar.

Ingredients:
  • 1 1/2 cups flour
  • 1 1/4 cup oats
  • 1/3 cup packed brown sugar
  • 1 1/2 tablespoons baking powder
  • 2 teaspoons cinnamon
  • 2 teaspoons allspice
  • 1 egg
  • 1 egg white
  • 2 tablespoons vegetable oil
  • 1 heaped cup yoghurt
  • 1/3 cup honey
  • 1 teaspoon vanilla
  • 5 peaches
Crumble topping:
  • Butter
  • Flour
  • Brown sugar
  • Oats
  • Finely chopped walnuts
  • All spice

Preheat the oven to 200 C, and grease a 12 cup muffin tray well. 

Mix the flour, oats, baking powder, sugar and spices in a bowl.  In a second bowl, whisk your wet ingredients.


Peel and dice your peaches and stir them through your wet ingredients.  Stir in the dry ingredients.


Spoon into your muffin pan.  Don't overfill them because you are going to add crumble topping to that business!


Rub your crumble topping together with your fingers.  Don't bother measure anything, just use roughly equal proportions of all the dry ingredients (except the allspice) and mix.  If it's too dry,  add butter. If too wet, add more flour and sugar.  Sprinkle generously over the muffins and gently press in. 


Bake for 20 minutes.  Remove from the oven and cool for 5 minutes in the pan, then on a wire rack.


Take to work in a cane basket lined with a gingham teatowel.  For real.

*Unless your using one of my recipes, in which case I have already amped up the spices hugely.  Then again, go harder than me.  I will only respect you.

Saturday, March 3, 2012

Zucchini flowers with goats curd


We've been getting to the Farmer's Market a more frequently.  I'm not sure whether it's nesting, budgeting, or just better organisation, but it's been brilliant to have an abundance of gorgeous fruit in the house.  And last week we came home with zucchini flowers! Delicate, baby zucchini flowers.

And here's the thing.  When you're pregnant there's this endless list of stuff you're not supposed to eat.  Like soft cheeses.  SOFT CHEESE I TELLS YA! Unless, that is, they're cooked.  So being a resourceful woman, one starts concocting all kinds of reasons for heating up cheese.  Reasons like zucchini flowers...

We got ourselves some Meredith goat's curd (and can I just say: Holy Crapballs is THAT stuff good!).  And we already have a supply of black truffle salt.  Yeah, you heard. And then we fried.

I'd never cooked these before so had no idea really what I was doing, and it didn't matter because it turns out that it was pretty simple.  The baby zucchinis are sweet and succulent, and all the batter fried cheese is goes 'pouffe' in your mouth in a way that is so seriously good that you'll wolf them all before you know what's happened.

So next time you need to impress guests or pregnant ladies, look no further than this recipe. For real.

Ingredients:
  • 4 Baby zucchini flowers
  • 4 teaspoons goat's curd
  • Truffle salt (or regular salt, for the prols)
  • Canola or vegetable oil for frying
 For the batter:
  • 3/4 cup of flour
  • 1 egg
  • 1/2 cup water


Start by preparing your batter.  Whisk together the ingredients to form a loose paste, adding more flour or water as needed.


Gently rinse and pat dry the zucchini flowers, and split open the tops to about two thirds of the way down.  Then it all gets a bit Sapphic, as you need to pinch the stamen inside and gently twist to remove it, without disturbing the surrounding petals.  Rest the flowers on a tea towel.


Mix a pinch of truffle salt into the goats curd and spoon a small amount into each zucchini flower, using your finger to push it down inside.  Then pinch together the petals to seal the flower.  Heat your oil.


Dip the flowers in batter and fry until golden brown, then drain on paper towel.


If you have left over goats curd that you simply HAVE to cook, then roll it into balls, roll in bread crumbs and then dunk in the batter and fry in the oil until they form crunchy, cheesy nobbins of amazingness.  Drain these along side your zucchini flowers and drizzle with Tobasco or some other spicy sauce.

Eat the lot with a fresh, tangy heirloom tomato and basil salad.

Sunday, February 26, 2012

Orange and Beetroot Quinoa Salad


It's been one of those stifling Melbourne weekends where all I seem to be able to manage is lying in a puddle on the floor when I should really be writing a thesis and going for runs and other things of that nature.  At least this weekend I managed to eat well.  


This salad works hot or cold, but if it's been 38 degrees then I'd go with cold.  It's refreshing, tangy with little crunchy almond surprises scattered throughout.  I have also been telling myself it's full of nutritional value, which makes that potato cake I had before seem all okay.


Ingredients:
  • 1 cup quinoa
  • 2 oranges
  • 1 beetroot plus leaves
  • 1 cup almonds
  •  teaspoon cinnamon
  • good olive oil 
  • salt and pepper for seasoning

Cook the quinoa in 1.5 cups liquid made up of the juice of one orange and the rest boiling water.*  While it's cooking prepare you're other ingredients.


Strip the beetroot of its leaves and reserve them.  Peel the beetroot and grate.  Rinse the leaves and finely shred.  Halve the remaining orange, remove the pith and peel from one half and chop into small pieces.  Juice the other half of the orange and reserve for the dressing.


Roughly hew the almonds and toast in a dry pan until beginning to brown.


Once the quinoa is done add the orange, beetroot, leaves and almonds and toss through.  Dress the salad with the remaining orange juice, a drizzle of olive oil, the cinnamon and a little salt and pepper.  Delicious.


*If you've never cooked quinoa, a basic method involves placing it in 1.5 times the quantity of boiling water, cover and simmer for 15 minutes, then with the lid still on take off the heat and rest for another five minutes.

Thursday, February 16, 2012

Sticky sesame chicken wings


Do you remember how when you you were little, and it was getting close to your parent's pay day and you would have those cheap meals that could feed a family for a few dollars (you only figured this out retrospectively)?  In my family these meals included fried rice, spinach pancakes and lentil rissoles.  Also, chicken wings.  Mum would do these in a way so that they were coated with crunchy sesame seeds.


In my quest to eat protein and not spend too much money, I decided to cook chicken wings for the first time in my adult life (I know, shame on me). It should be said that they were hella cheap.  And I decided to recreate my Mum's recipe to the best of my knowledge and with what is in the house.  This is now sincerely one of my staple, cheap healthy, super fast and easy recipes. So here it is:

Ingredients:*
  • Chicken wings (I had eight)
  • 1/2 cup soy sauce
  • 1/2 cup sweet chilli sauce
  • 1 tablespoon sesame oil
  • knob of ginger, finely chopped
  • shitloads of sesame seeds


Mix together the soy, sweet chilli, oil and ginger and mix with a spoon into a paste.  Place your chicken wings in a baking tray and spoon the marinade over them all.  Then turn the wings over and over until they're thoroughly coated in the sauce.  Pour the sesame seeds over the wings until both sides are good and coated.


Place in the fridge for at least an hour (preferably two) and turn the chicken through the marinade approximately every 30 minutes.  Then place in a 180 degree oven for 45 minute or until they're looking crispy on the pointy bits, and brown everywhere else.  Turn them at about the 30 minute mark.


Eat them with your fingers with corn and potatoes.  Trust me.  Do it.


*Since I don't ever really measure anything unless I'm doing something fancy-pants like baking, these amounts are just a rough estimate.  If in doubt about quantities, use more.

Sunday, February 12, 2012

Polenta crusted calamari


 Sunday's have somehow become seafood day.  The combination of a very-full time work week plus some study on top typically means that the only food purchasing available to me during the week is either Coles or Woolworths (which I detest, both ideologically and practically as their fresh food is rubbish).  So weekends is the only time I can get to a decent green grocer, butcher and fishmonger.  And since I don't like freezing seafood I often mind myself cooking it on a Sunday night.  Last week it was salmon steak with brussel sprouts and quinoa salad (don't even get me started.  I'll post the sprouts sometime, I promise.  They were killer.)

But this week it's calamari.  Did you know that calamari is one of the most sustainable types of seafood you can eat?  Seriously, check this out.  And what better way to eat it than super crispy with my two favourite flavours: Salt and Pepper.  It takes 10 mins from start to finish and is almost completely healthy if you overlook the frying bit, and eat it with salad.


Ingredients:
  • Fresh, local calamari rings
  • 1 cup flour
  • 1/2 cup milk
  • 1 cup polenta
  • Lots and lot of salt and pepper
  • Oil for frying
 
Rinse the calamari and shake off the excess water.  Prepare your flour, and polenta on plates for coating and your milk in a bowl for dipping.  Add salt and pepper to the polenta mix, as much as you'd like.  I prefer to use LOTS.  In fact, I have a ready made mix of cracked black pepper, szechuan pepper crushed in the mortar and pestle, and sea salt for just such occasions.


So get your calamari ready as follows: Flour. Milk. Polenta. Flour. Milk. Polenta.  Just like that, until you've coated them all.  Then heat about an inch of your oil in a pan.


Once it's hot, fry your rings for a minute or two, but no longer! If you over cook them, they become tough and chewy and you don't want that.  Drain them on a paper towel.


While the calamari are frying, whip up a quick green salad.  Mine had cos lettuce, cucumber, and two kinds of tomatoes.

Place the calamari on top of the salad and squeeze lemon juice over the lot. Done.