Showing posts with label chocolate. Show all posts

Monday, May 14, 2012

Chocolate, pine nut and orange tart in a ginger crust


This weekend I had dinner with my friends Lucy (check out her morsels of reflection here) and Jason. Whenever they've cooked for me in the past I have been a bit awed by how yummy everything is - and they tend to cook meals I rarely make myself, making them all the more enjoyable. So when I offered to bring dessert, and Lucy kindly asserted that I needn't feel I had to make anything too fancy, I kind of knew I was going to make something that was at least a bit fancy. Also, I probably should have been studying on Saturday afternoon, so the idea of making some pastry from scratch was all the more appealing.

This tart is one I've made before. It's all about contrasts.  The chocolate is divinely rich, but in small proportion compared with the tang of the orange and ginger. The ganachey-custard is so incredibly smooth whereas the pine nuts add a lovely crunch, while the pastry is all buttery crumbliness. And the nuts and zest themselves crispen to form a fragile sugary crust over the whole thing.  Best of all, the pastry recipe is very easy. Oh goodness, I do endorse this tart.

I found the recipe for this tart online, from chef Antoine Bouterin.  However adding the ginger to the pastry is my own addition, for that extra kick.

Ingredients - for the pastry:
  • 70 grams butter
  • 1/3 cup caster sugar
  • 2 egg yolks
  • 1 1/14 cup flour
  • 2 teaspoons ground ginger
  • splash of iced water
For the filling:
  • 1/2 cup cream
  • 1 egg
  • 2 tablespoons caster sugar
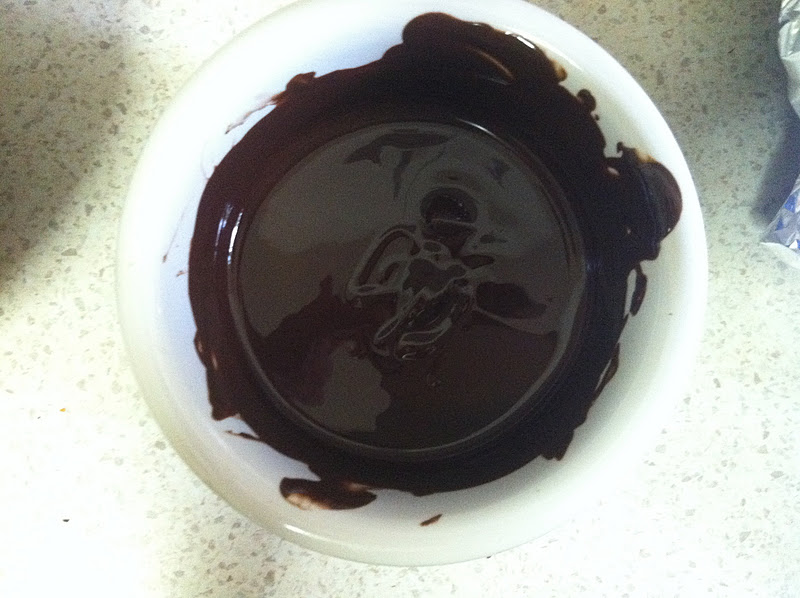
  • 180g dark chocolate pieces
  • 3/4 cup pine nuts
  • zest of one orange

While it's not tricky, you need to start a little ahead of time if you want to make your own pastry. For shortcrust pastry I really recommend doing it yourself, as the result is always so lovely and fresh and buttery. When making pastry, I tend to cheat. I put all the ingredients in my mixer and turn it on until it's a crumbly mix. Then I tip it into my greased and floured tart tin (about 9 inches across).


Press the mix with the heel of your hand until it evenly covers the tin, making sure you smoosh enough over the sides to form the lovely corrugated edges. Once it's evenly covered, place in the fridge for about 30 minutes.


Now it's time to pre-bake the tart case. Heat the oven to 180 C. Prick your tart case with a fork all over the bottom, and line it with tin foil, pressing the foil firmly against the pastry all the way around.  Now bake for about 15 minutes, then remove the foil and bake for another 10.  When you remove the pastry from the oven, if it looks like it's raising up from the base of the tin a little, just gently push it back down.


Now add your filling. Mix the cream, sugar and egg with a fork or whisk and pour into the tart case. It will form a very shallow layer. Scatter over the chocolate pieces, making sure they're evenly distributed. Next, add the pine nuts. And finally, sprinkle over the orange zest.


Place the whole lot in the oven at a 175 C and cook for 20-25 minutes.


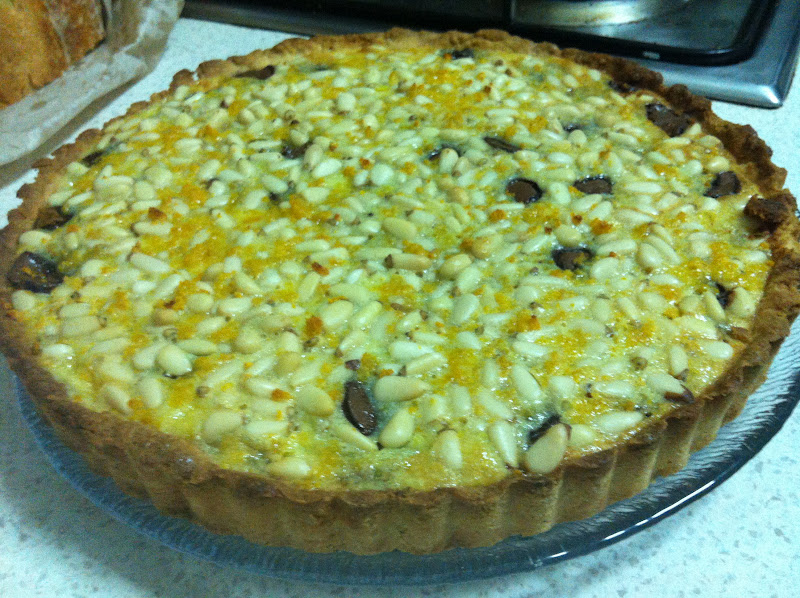
Serve in delicate wedges with whipped cream. Oh yes indeedy.


Monday, April 30, 2012

Wholesome oatey choc chip and walnut biscuits


I am always short of work snacks.  Which is not to imply that I'm not taking plenty of them to work.  But I eat them all by midday*.  Couple my all-consuming consumption, and our frugal budget, and I got home from work tonight (Monday night) resolved to bake some sweet, wholesome, filling, slightly nutritious biscuits to fill the gaping few hours in the afternoon that I am without snacks.  These are eating-for-cheap biscuits.  And you can make them between getting home and dinner if you're on top of your game.

Ingredients:
  • 1 cup flour
  • 3/4 cup rolled oats
  • 1/2 cup caster sugar
  • 1/2 cup brown sugar
  • 150g butter
  • 1 egg
  • vanilla essence
  • 1 cup walnuts, chopped
  • 1 cup chocolate chips, chopped 

Follow the unwavering template of biscuit making.  Heat the oven to 160 degrees.

Cream the butter, sugars and vanilla with a hand mixer.  Add the egg and beat through.  Add the flour and repeat until mixed.


Now you must turn from your mixer to your trusty wooden spoon.  Add the oats, walnuts and chocolate and stir through.  It takes elbow grease, but it only takes about 30 seconds to combine.


Spoon into balls and place on baking sheet-lined trays.  Bake for 15 minutes.  Cool.


*This mad hunger and incessant eating is easily the big winner of pregnancy thus far.  That and the impending baby, of course.  Oh, but the eating! The shame-free adolescent-style cramming! I'm into it.

Sunday, April 15, 2012

Self-saucing Chocolate Pudding


I am seriously getting a kick out of the turn of the seasons, and snuggling about at home in the evenings with slippers on and comfort food.  Also, given that I'm not drinking at the moment, I have a lot of spare calories to ingest.  This generally means dessert.  Never once a huge dessert eater, I am rocking them with regularity at the moment.

The king of the meals this week was the steak and oven chips with salad Leith put together on Wednesday night, followed by this here chocolate pudding.  Now the Thomas family apparently inherited a pudding recipe with near-magical qualities, the likes of which other puddings can't compare.  This recipe has since been lost, and so ever since we've been meandering through various recipes*.  And this Wednesday, I made one worthy of a post.  Dense, chocolatey, with a fudgy sauce.  Fudginess is just so, so important in a self-saucing pudding.  Wouldn't you agree?  And easy peasy to make.  I know all about those recipes that involve melted chocolate and cooled liquid butter and goodness knows what else.  But as far as I'm concerned, if a recipe for self-saucing pudding isn't unbelievably easy to make, then it's dead to me.  Dead, I tells ya.  I want to know that I will have all the ingredients without having to get off the couch to look.  I want to cook it in the same dish I mix it so there's minimal dishes.  I want to eat it no more than 30 minutes after I think of it.  In those terms, this recipe can deliver...

Ingredients:
  • 1 cup self-raising flour
  • 1/2 cup brown sugar
  • 3 tablespoons cocoa
  • 80 grams butter
  • 1 cup milk
  • splash vanilla essence
Sauce
  • 1/2 cup brown sugar
  • 4 heaped tablespoons cocoa
  • 2 cups boiling water

Heat the oven to 180 degrees C.  Boil the kettle.  Take out your pudding dish.  This may or may not be a much loved hand-me-down Corningware dish from which you ate pudding as a child.


In a heavy casserole dish, mix the flour, sugar and cocoa.  Melt the butter and add this to the dish, with the milk and vanilla.  Stir.


Mix the extra brown sugar and cocoa and sprinkle evenly over the pudding batter.  Pour over two cups of boiling water (pour the water over the back of a spoon so that it doesn't disturb the surface of the pudding too much).


Put in the oven for 30 minutes.  Remove.  Eat**.


*I want you guys to know that I'm talking about over a couple of years here.  Not every night or anything.  We're not that out of control.  Yet.

**Look, I don't want to tell you how to live your life, but if you're wooing someone or generally want to express love for somebody and maybe who knows? also hoping to get some action,... make this pudding for them.  Because, let's face it, anyone who can create an incredible, hot, chocolatey dessert that comes with its own goddam sauce in 30 minutes is looking pretty good. Amirite? Alright.

Sunday, January 22, 2012

Chocolate, ricotta and blueberry cake with chocolate-yoghurt icing


I was in Brisbane last week when my boss arrived home from his overseas trip and emailed my office to say there were fancy chocolates in the kitchen for whoever wanted them.  I wanted them! But I was in stupid Brisbane.  So I email-bribed my workmates with the promise of baking, and lo, they saved me some chocolates.  So today I am making good and baking a cake for Monday afternoon. 


Because it is my cake and my decision, the cake had to involve chocolate.  But I didn't want it to be too sweet, nor too dense.  So I looked up cakes with fruit.  I was hoping to find something involving peaches, but then I stumbled upon a recipe involving blueberries and ricotta and my decision was made.  However, the original said to dust with icing sugar, and I knew I could do better than that. So I added a ganache-like icing made with yoghurt for some extra tang.

Ingredients:
  • 2 cups SR flour
  • 1 cup castor sugar
  • 1/4 cup cocoa
  • 250g ricotta
  • 100g butter
  • 1 cup hot water
  • 2 punnets blueberries
Chocolate yoghurt icing
  • 1 cup dark cooking chocolate pieces
  • 1/4 cup greek yoghurt

Grease a 22cm cake tin and heat the oven to 160.  Sift your flour, sugar and cocoa into a large bowl.  Melt the butter (I do this in the microwave, being careful not to have it explode) and add with the water and ricotta to the dry ingredients. Stir thoroughly until all ingredients are mixed through, especially the ricotta.  Then fold in one cup of the blueberries, reserving the rest for decorating the finished cake.


Place in the oven for an hour, or until a skewer inserted comes out clean (if your oven isn't fan forced you may want to cook it for an extra 15 to 20 minutes). Once cooked, cool in the pan for 5 minutes then on a rack.


Prepare the icing by melting the chocolate and stirring through the yoghurt.  Smooth over the cake while pliable and glossy, then place in the fridge to set. 


Top with the remaining blueberries to serve.


Very impressive for such an easy cake.


Monday, December 12, 2011

Chocolate-dipped cherries


What do you do when your Mum is a highly successful consultant and receives hampers filled with cherries as Christmas presents, and then gives you heaps of cherries and then you get home and your boyfriend says he doesn't really eat cherries?


You dip them in chocolate and serve them to guests, that's what!


Calling this a recipe feels like a cop-out, but sometimes it's all too easy to forget how good dipping fruit in chocolate can be.  Let this be your reminder.


Ingredients:
  • dark chocolate
  • cherries

Melt the chocolate in the microwave, in 20 second batches.  When it's about two thirds melted, remove it and stir until it completely melts (this will prevent burning and keep the chocolate lovely and glossy.


 Line a plate with foil.  Dip your cherries and place on the plate.  Then put them in the fridge.


Pull them out to impress guests during the festive season. And have a few yourself every now and then, just to continue the spirit of the things, and make a contribution.

Sunday, November 20, 2011

Double chocolate biscuits with crunchy pepita tops


In a bid to be economical, we are attempting to not buy lunch at all this week, and to cook all the fresh food in the house before doing something reckless like going out for laksa.  So, for purely financial reasons I felt compelled to bake us a supply of biscuits to provide sweet sweet sustenance throughout the work week.


But because it's Sunday and I'm feeling pretty lazy, I decided I couldn't be arsed with recipes.  And I figured, biscuits, how hard can they be, right?  So I made some.  Just like that.  I didn't really know what I was doing so I didn't bother with any measurements that weren't bleedingly obvious.   And they've turned out to be pretty darn alright. I am feeling mighty chuffed right this moment.


Ingredients:
  • 125g, or half a stick, unsalted butter
  • 1 cup brown sugar
  • vanilla essence
  • 1 egg
  • 1 1/2 cups plain flour
  • nutmeg
  • 2 tablespoons cocoa
  • 50g couverture chocolate
  • pepitas (aka little green seeds)

Make them the way you'd make any biscuits.  Heat the oven to 160 degrees (or 170 if your oven isn't fan-forced).  Cream the butter and sugar.  Add the vanilla and egg and continue to beat.  Add the flour, nutmeg and cocoa and beat.


Take the square of chocolate and hack it into shards.  If it's good quality chocolate it will shatter nicely.  Stir it into the biscuit dough.


Line two trays with baking paper.  Scoop the dough into walnut sized balls and press the tops slightly with your fingers.  Then press them gently into the pepitas and place them on the trays.


Bake for 15 minutes.  While baking, paint your nails.  Cool them on a rack.  Poke them with your finger.  Check they're not poisoned.  Check again, you'd really hate to be poisoning people accidentally.


Then sit down properly like a civilised lady and have two more with a cup of rooibos chai.