Showing posts with label dessert. Show all posts

Monday, May 14, 2012

Chocolate, pine nut and orange tart in a ginger crust


This weekend I had dinner with my friends Lucy (check out her morsels of reflection here) and Jason. Whenever they've cooked for me in the past I have been a bit awed by how yummy everything is - and they tend to cook meals I rarely make myself, making them all the more enjoyable. So when I offered to bring dessert, and Lucy kindly asserted that I needn't feel I had to make anything too fancy, I kind of knew I was going to make something that was at least a bit fancy. Also, I probably should have been studying on Saturday afternoon, so the idea of making some pastry from scratch was all the more appealing.

This tart is one I've made before. It's all about contrasts.  The chocolate is divinely rich, but in small proportion compared with the tang of the orange and ginger. The ganachey-custard is so incredibly smooth whereas the pine nuts add a lovely crunch, while the pastry is all buttery crumbliness. And the nuts and zest themselves crispen to form a fragile sugary crust over the whole thing.  Best of all, the pastry recipe is very easy. Oh goodness, I do endorse this tart.

I found the recipe for this tart online, from chef Antoine Bouterin.  However adding the ginger to the pastry is my own addition, for that extra kick.

Ingredients - for the pastry:
  • 70 grams butter
  • 1/3 cup caster sugar
  • 2 egg yolks
  • 1 1/14 cup flour
  • 2 teaspoons ground ginger
  • splash of iced water
For the filling:
  • 1/2 cup cream
  • 1 egg
  • 2 tablespoons caster sugar
  • 180g dark chocolate pieces
  • 3/4 cup pine nuts
  • zest of one orange

While it's not tricky, you need to start a little ahead of time if you want to make your own pastry. For shortcrust pastry I really recommend doing it yourself, as the result is always so lovely and fresh and buttery. When making pastry, I tend to cheat. I put all the ingredients in my mixer and turn it on until it's a crumbly mix. Then I tip it into my greased and floured tart tin (about 9 inches across).


Press the mix with the heel of your hand until it evenly covers the tin, making sure you smoosh enough over the sides to form the lovely corrugated edges. Once it's evenly covered, place in the fridge for about 30 minutes.


Now it's time to pre-bake the tart case. Heat the oven to 180 C. Prick your tart case with a fork all over the bottom, and line it with tin foil, pressing the foil firmly against the pastry all the way around.  Now bake for about 15 minutes, then remove the foil and bake for another 10.  When you remove the pastry from the oven, if it looks like it's raising up from the base of the tin a little, just gently push it back down.


Now add your filling. Mix the cream, sugar and egg with a fork or whisk and pour into the tart case. It will form a very shallow layer. Scatter over the chocolate pieces, making sure they're evenly distributed. Next, add the pine nuts. And finally, sprinkle over the orange zest.


Place the whole lot in the oven at a 175 C and cook for 20-25 minutes.


Serve in delicate wedges with whipped cream. Oh yes indeedy.


Sunday, April 15, 2012

Self-saucing Chocolate Pudding


I am seriously getting a kick out of the turn of the seasons, and snuggling about at home in the evenings with slippers on and comfort food.  Also, given that I'm not drinking at the moment, I have a lot of spare calories to ingest.  This generally means dessert.  Never once a huge dessert eater, I am rocking them with regularity at the moment.

The king of the meals this week was the steak and oven chips with salad Leith put together on Wednesday night, followed by this here chocolate pudding.  Now the Thomas family apparently inherited a pudding recipe with near-magical qualities, the likes of which other puddings can't compare.  This recipe has since been lost, and so ever since we've been meandering through various recipes*.  And this Wednesday, I made one worthy of a post.  Dense, chocolatey, with a fudgy sauce.  Fudginess is just so, so important in a self-saucing pudding.  Wouldn't you agree?  And easy peasy to make.  I know all about those recipes that involve melted chocolate and cooled liquid butter and goodness knows what else.  But as far as I'm concerned, if a recipe for self-saucing pudding isn't unbelievably easy to make, then it's dead to me.  Dead, I tells ya.  I want to know that I will have all the ingredients without having to get off the couch to look.  I want to cook it in the same dish I mix it so there's minimal dishes.  I want to eat it no more than 30 minutes after I think of it.  In those terms, this recipe can deliver...

Ingredients:
  • 1 cup self-raising flour
  • 1/2 cup brown sugar
  • 3 tablespoons cocoa
  • 80 grams butter
  • 1 cup milk
  • splash vanilla essence
Sauce
  • 1/2 cup brown sugar
  • 4 heaped tablespoons cocoa
  • 2 cups boiling water

Heat the oven to 180 degrees C.  Boil the kettle.  Take out your pudding dish.  This may or may not be a much loved hand-me-down Corningware dish from which you ate pudding as a child.


In a heavy casserole dish, mix the flour, sugar and cocoa.  Melt the butter and add this to the dish, with the milk and vanilla.  Stir.


Mix the extra brown sugar and cocoa and sprinkle evenly over the pudding batter.  Pour over two cups of boiling water (pour the water over the back of a spoon so that it doesn't disturb the surface of the pudding too much).


Put in the oven for 30 minutes.  Remove.  Eat**.


*I want you guys to know that I'm talking about over a couple of years here.  Not every night or anything.  We're not that out of control.  Yet.

**Look, I don't want to tell you how to live your life, but if you're wooing someone or generally want to express love for somebody and maybe who knows? also hoping to get some action,... make this pudding for them.  Because, let's face it, anyone who can create an incredible, hot, chocolatey dessert that comes with its own goddam sauce in 30 minutes is looking pretty good. Amirite? Alright.

Saturday, January 28, 2012

Sweet Mango Sticky Rice


The return to work has happened and the new year's for healthy work snacks has also taken place.  And my brother recently bragged to me about having made what sounds like a pretty amazingly delicious savoury sticky rice, which got me thinking.


And THEN I discovered the local Asian grocers has a steady stock of frozen banana leaves.  This sealed the deal.  Although I was not interested in savoury sticky rice as a work snack.  I was interested in sweet and fruity sticky rice for the 4pm slump.  And since it's Summer here in Melbourne and mangoes are in season, there was really no need to consider any other fruits, what with mangoes being king of the fruits.

So this sticky rice is remarkably easy.  You need to start it a day in advance, but apart from that it's a breeze.  I now have a stash of single serve parcels in my freezer that I'm chomping through at my leisure.  And because it's sticky rice, you can microwave it to defrost and warm, and it only gets stickier and more delicious.

Ingredients:
  • 2 cups medium grain rice
  • 2 cups coconut milk
  • 2/3 cup palm sugar
  • 1 mango
  • chia seeds
  • banana leaves

 One day ahead of time, soak the rice in cold water and leave overnight.


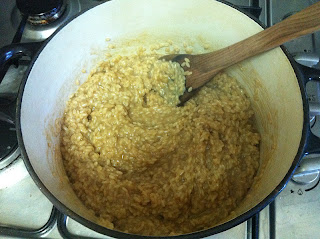
The following day, drain the water off the rice and place in a large pot.  Add the coconut milk and sugar and bring to a medium heat.  Stir the rice over the heat so it doesn't stick and burn, while it absorbs the coconut milk, as though you are making a sweet, sticky risotto.  Once it is thick and very risotto like, turn off the heat and leave to cool.


At this point the rice won't be cooked through yet, but that's ok.  We're not done yet!

While the rice cools, slice the mango into long thin strips.


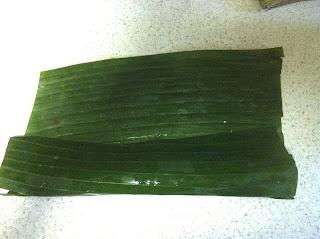
Prepare your banana leaves (which are enormous) by cutting them into roughly A4 sized pieces, trimming any manky edges and washing them.


Then prepare you sticky rice parcels.

First lay your banana leaf down.  Then place a sprinkling of chia seeds in a 5cm line down the centre.


Place a spoon of the rice over the chia seeds, followed by a sliver of mango, then another spoon of rice.


Then fold the banana leaf over the rice, pressing it together firmly, fold the sides in and roll over until sealed.


Repeat this for all your parcels, then place them in steaming baskets and steam over water for 40 minutes.


Yum yum yum yum yum.

Saturday, October 29, 2011

Pavlova roll with an almond crust and strawberry cream


I've failed to post once in this month of October.  I have also failed to cook more than the most perfunctory food to cram in my gob.  I've been having another of those work and study frenzies you see.


But now I'm going to make it up to you with this amazing, decadent, easy-peasy Pavlova roll.  My Mum has always made this for dinner parties and when I was little I thought it was super fancy (and who am I kidding, I still do!).  The recipe for the Pav has come from my Nanna and it is a fail-safe, perfect-every-time kind of a number.


Then there is the deliciousness factor.  The Pavlova is fluffy and moist, the crust is light and crunchy and the berry cream filling is fresh and luscious.  All together it's utterly divine.  I don't know why Pavlova tastes better in a roll.  It just does.

Ingredients:
  • 6 egg whites
  • 225g castor sugar
  • 1/4 teaspoon salt
  • 1 teaspoon vanilla essence
  • 1 teaspoon white vinegar
  • 1 teaspoon cornflour
  • cream
  • table spoon of icing sugar
  • strawberries
  • 1 cup flaked almonds


 Heat the oven to 180 degrees and turn it down to about 160 when you put the pavlova in. Line a wide, shallow baking dish - like a swiss roll tin - with baking paper.

Beat the egg whites with the salt until soft peaks form, and add the sugar, beating until stiff and dissolved.  With a large spoon, gently fold in the vanilla, vinegar and cornflour*.  Pour into your tray and smooth out the surface so that it's more or less even.  Then scatter the flaked almonds over the top.


 Put in the oven for about 30 minutes (check regularly to see the top doesn't burn).  Remove immediately and turn onto a clean tea towel.  Roll up in the tea towel and leave it to cool.  Ideally it will roll around itself like a Swiss roll, but my Pav was so successful and fluffy that the most I could manage was a tiny amount of overlap. 


When you're ready to serve it, whip your cream with an extra spoon of icing sugar and a drop of vanilla.  Slice your strawberries very fine.  Unroll the Pavlova (it may crack a little - this is okay as you can patch it up when we roll it again) and line with the strawberries, then the cream.  Roll back up gently and place on a serving tray with extra strawberries.  Voila!


When serving, cut it into inch-wide slices. This is one of those dishes that is astoundingly easy but never fails to impress.  And I've never met anyone who didn't love it!  Pavlova: it's better in a roll.


*To make a regular round Pavlova, spread the mixture into a circle and make the edges a little higher, on a lined tray.  Bake for 30 minutes but leave to cool in the oven before removing it.