Sunday, February 26, 2012

Orange and Beetroot Quinoa Salad


It's been one of those stifling Melbourne weekends where all I seem to be able to manage is lying in a puddle on the floor when I should really be writing a thesis and going for runs and other things of that nature.  At least this weekend I managed to eat well.  


This salad works hot or cold, but if it's been 38 degrees then I'd go with cold.  It's refreshing, tangy with little crunchy almond surprises scattered throughout.  I have also been telling myself it's full of nutritional value, which makes that potato cake I had before seem all okay.


Ingredients:
  • 1 cup quinoa
  • 2 oranges
  • 1 beetroot plus leaves
  • 1 cup almonds
  •  teaspoon cinnamon
  • good olive oil 
  • salt and pepper for seasoning

Cook the quinoa in 1.5 cups liquid made up of the juice of one orange and the rest boiling water.*  While it's cooking prepare you're other ingredients.


Strip the beetroot of its leaves and reserve them.  Peel the beetroot and grate.  Rinse the leaves and finely shred.  Halve the remaining orange, remove the pith and peel from one half and chop into small pieces.  Juice the other half of the orange and reserve for the dressing.


Roughly hew the almonds and toast in a dry pan until beginning to brown.


Once the quinoa is done add the orange, beetroot, leaves and almonds and toss through.  Dress the salad with the remaining orange juice, a drizzle of olive oil, the cinnamon and a little salt and pepper.  Delicious.


*If you've never cooked quinoa, a basic method involves placing it in 1.5 times the quantity of boiling water, cover and simmer for 15 minutes, then with the lid still on take off the heat and rest for another five minutes.

Thursday, February 16, 2012

Sticky sesame chicken wings


Do you remember how when you you were little, and it was getting close to your parent's pay day and you would have those cheap meals that could feed a family for a few dollars (you only figured this out retrospectively)?  In my family these meals included fried rice, spinach pancakes and lentil rissoles.  Also, chicken wings.  Mum would do these in a way so that they were coated with crunchy sesame seeds.


In my quest to eat protein and not spend too much money, I decided to cook chicken wings for the first time in my adult life (I know, shame on me). It should be said that they were hella cheap.  And I decided to recreate my Mum's recipe to the best of my knowledge and with what is in the house.  This is now sincerely one of my staple, cheap healthy, super fast and easy recipes. So here it is:

Ingredients:*
  • Chicken wings (I had eight)
  • 1/2 cup soy sauce
  • 1/2 cup sweet chilli sauce
  • 1 tablespoon sesame oil
  • knob of ginger, finely chopped
  • shitloads of sesame seeds


Mix together the soy, sweet chilli, oil and ginger and mix with a spoon into a paste.  Place your chicken wings in a baking tray and spoon the marinade over them all.  Then turn the wings over and over until they're thoroughly coated in the sauce.  Pour the sesame seeds over the wings until both sides are good and coated.


Place in the fridge for at least an hour (preferably two) and turn the chicken through the marinade approximately every 30 minutes.  Then place in a 180 degree oven for 45 minute or until they're looking crispy on the pointy bits, and brown everywhere else.  Turn them at about the 30 minute mark.


Eat them with your fingers with corn and potatoes.  Trust me.  Do it.


*Since I don't ever really measure anything unless I'm doing something fancy-pants like baking, these amounts are just a rough estimate.  If in doubt about quantities, use more.

Sunday, February 12, 2012

Polenta crusted calamari


 Sunday's have somehow become seafood day.  The combination of a very-full time work week plus some study on top typically means that the only food purchasing available to me during the week is either Coles or Woolworths (which I detest, both ideologically and practically as their fresh food is rubbish).  So weekends is the only time I can get to a decent green grocer, butcher and fishmonger.  And since I don't like freezing seafood I often mind myself cooking it on a Sunday night.  Last week it was salmon steak with brussel sprouts and quinoa salad (don't even get me started.  I'll post the sprouts sometime, I promise.  They were killer.)

But this week it's calamari.  Did you know that calamari is one of the most sustainable types of seafood you can eat?  Seriously, check this out.  And what better way to eat it than super crispy with my two favourite flavours: Salt and Pepper.  It takes 10 mins from start to finish and is almost completely healthy if you overlook the frying bit, and eat it with salad.


Ingredients:
  • Fresh, local calamari rings
  • 1 cup flour
  • 1/2 cup milk
  • 1 cup polenta
  • Lots and lot of salt and pepper
  • Oil for frying
 
Rinse the calamari and shake off the excess water.  Prepare your flour, and polenta on plates for coating and your milk in a bowl for dipping.  Add salt and pepper to the polenta mix, as much as you'd like.  I prefer to use LOTS.  In fact, I have a ready made mix of cracked black pepper, szechuan pepper crushed in the mortar and pestle, and sea salt for just such occasions.


So get your calamari ready as follows: Flour. Milk. Polenta. Flour. Milk. Polenta.  Just like that, until you've coated them all.  Then heat about an inch of your oil in a pan.


Once it's hot, fry your rings for a minute or two, but no longer! If you over cook them, they become tough and chewy and you don't want that.  Drain them on a paper towel.


While the calamari are frying, whip up a quick green salad.  Mine had cos lettuce, cucumber, and two kinds of tomatoes.

Place the calamari on top of the salad and squeeze lemon juice over the lot. Done.

Saturday, January 28, 2012

Sweet Mango Sticky Rice


The return to work has happened and the new year's for healthy work snacks has also taken place.  And my brother recently bragged to me about having made what sounds like a pretty amazingly delicious savoury sticky rice, which got me thinking.


And THEN I discovered the local Asian grocers has a steady stock of frozen banana leaves.  This sealed the deal.  Although I was not interested in savoury sticky rice as a work snack.  I was interested in sweet and fruity sticky rice for the 4pm slump.  And since it's Summer here in Melbourne and mangoes are in season, there was really no need to consider any other fruits, what with mangoes being king of the fruits.

So this sticky rice is remarkably easy.  You need to start it a day in advance, but apart from that it's a breeze.  I now have a stash of single serve parcels in my freezer that I'm chomping through at my leisure.  And because it's sticky rice, you can microwave it to defrost and warm, and it only gets stickier and more delicious.

Ingredients:
  • 2 cups medium grain rice
  • 2 cups coconut milk
  • 2/3 cup palm sugar
  • 1 mango
  • chia seeds
  • banana leaves

 One day ahead of time, soak the rice in cold water and leave overnight.


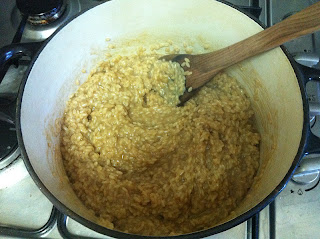
The following day, drain the water off the rice and place in a large pot.  Add the coconut milk and sugar and bring to a medium heat.  Stir the rice over the heat so it doesn't stick and burn, while it absorbs the coconut milk, as though you are making a sweet, sticky risotto.  Once it is thick and very risotto like, turn off the heat and leave to cool.


At this point the rice won't be cooked through yet, but that's ok.  We're not done yet!

While the rice cools, slice the mango into long thin strips.


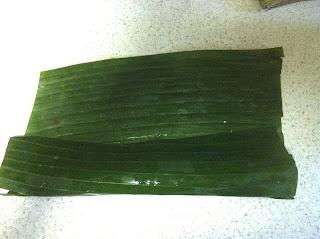
Prepare your banana leaves (which are enormous) by cutting them into roughly A4 sized pieces, trimming any manky edges and washing them.


Then prepare you sticky rice parcels.

First lay your banana leaf down.  Then place a sprinkling of chia seeds in a 5cm line down the centre.


Place a spoon of the rice over the chia seeds, followed by a sliver of mango, then another spoon of rice.


Then fold the banana leaf over the rice, pressing it together firmly, fold the sides in and roll over until sealed.


Repeat this for all your parcels, then place them in steaming baskets and steam over water for 40 minutes.


Yum yum yum yum yum.

Sunday, January 22, 2012

Chocolate, ricotta and blueberry cake with chocolate-yoghurt icing


I was in Brisbane last week when my boss arrived home from his overseas trip and emailed my office to say there were fancy chocolates in the kitchen for whoever wanted them.  I wanted them! But I was in stupid Brisbane.  So I email-bribed my workmates with the promise of baking, and lo, they saved me some chocolates.  So today I am making good and baking a cake for Monday afternoon. 


Because it is my cake and my decision, the cake had to involve chocolate.  But I didn't want it to be too sweet, nor too dense.  So I looked up cakes with fruit.  I was hoping to find something involving peaches, but then I stumbled upon a recipe involving blueberries and ricotta and my decision was made.  However, the original said to dust with icing sugar, and I knew I could do better than that. So I added a ganache-like icing made with yoghurt for some extra tang.

Ingredients:
  • 2 cups SR flour
  • 1 cup castor sugar
  • 1/4 cup cocoa
  • 250g ricotta
  • 100g butter
  • 1 cup hot water
  • 2 punnets blueberries
Chocolate yoghurt icing
  • 1 cup dark cooking chocolate pieces
  • 1/4 cup greek yoghurt

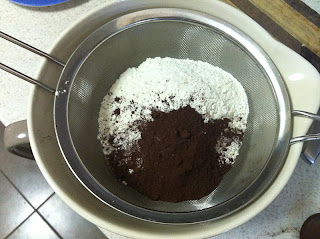
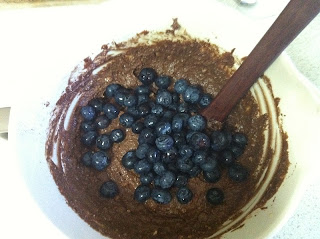
Grease a 22cm cake tin and heat the oven to 160.  Sift your flour, sugar and cocoa into a large bowl.  Melt the butter (I do this in the microwave, being careful not to have it explode) and add with the water and ricotta to the dry ingredients. Stir thoroughly until all ingredients are mixed through, especially the ricotta.  Then fold in one cup of the blueberries, reserving the rest for decorating the finished cake.


Place in the oven for an hour, or until a skewer inserted comes out clean (if your oven isn't fan forced you may want to cook it for an extra 15 to 20 minutes). Once cooked, cool in the pan for 5 minutes then on a rack.


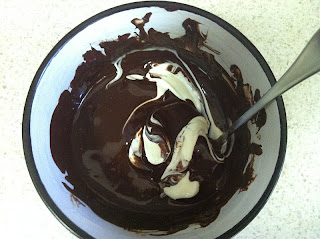
Prepare the icing by melting the chocolate and stirring through the yoghurt.  Smooth over the cake while pliable and glossy, then place in the fridge to set. 


Top with the remaining blueberries to serve.


Very impressive for such an easy cake.